五.游戏主逻辑
接下来我们要做的就是整个游戏的关键了。整个游戏能不能跑起来,就看我们这主逻辑写得咋样了。
游戏主逻辑我们这里分为几个部分:
- 卡牌的生成与渲染
- 战斗随从的生成
- 敌人的AI
- 战斗结算
- 水晶费用管理
- 剩余卡牌的管理
1.卡牌的生成与渲染
我们目前能让除了战斗场景之外的元素都顺利的显示出来了,但是还是有很多不对头的地方。我们手里拿的卡牌统统都还是卡背。这肯定是不对的,我们得让系统给我们生成一套卡组,然后把卡牌正确的样子显示出来。
因为我们这里并没有做玩家的自定义卡组,那么卡组的来源就需要我们想点办法了。这里我们采用的是随机生成卡组的方法。卡牌配置里面运行我们用什么样的卡牌,那么我们就只要生成相应数量的卡牌就是了。
在此之前,我们需要对我们的卡牌的数据进行相关的配置:
在module/config目录下新建一个CardCongfig.js:
1 |
|
以后如果我们有新的卡牌需要添加,就直接往这里面做配置就可以了。
解释下里面卡牌信息的字段: “name”:显示图的key;”fight“,战斗场景中的图片key;”cn_name”,中文名;”fee”,召唤费用;”attack”,攻击力;”hp”,生命值;”id”,唯一id。
卡牌的相关信息配置完成之后,我们现在就能生成手牌了。
手牌的生成方法很简单,比如我们需要生成15张手牌,那么我们只要产生15个在id范围之内的随机数就可以了。然后根据生成的唯一id去我们的config中去寻找相关的信息,然后渲染赋值就可以了。
下面开始来写我们的手牌id生成器,在class目录下创建一个CardGenerater.js:
1 |
|
我们后面就可以通过buildCardList这个方法来做随机的id列表生成。
继续开始改写我们的HandCard类,打开HandCard.js:
1 |
|
这里手牌生成的思路主要是,第一先把我们所有的卡组id列表生成出来,这里是从1到15张,然后从生成好的id列表中去截取数组的前4个部分(这里我们初始化手牌数量为4),然后通过id在CardConfig中去遍历一次,获取相关信息,然后后渲染出来,同时也把获取到的相关信息业赋给我们渲染出来的image对象,这样这张卡牌就拥有了所有我们需要的游戏信息。我们在卡片的点击事件中去打印了被点击的对象自己,相信大家能够在控制台中找到这个对象和我们赋给它的相关数据。
这里我们使用了tween动画,就是在我们点击相应的卡牌后,卡牌会向上平滑位移20个单位,以此来表示我们目前选中的就是该卡牌。tween动画的使用方法也很简单。如果对其参数有不了解的,可以去官网查询api。
这里还有一点需要注意
1 | DataManager.heroChoiseCard = this; |
整个游戏的数据管理都是在DataManager中进行的,炉石这个游戏,可以说是完全由数据驱动,棋牌类的游戏可以说基本都是这样,我们通过一个简单的操作,改变了相应的数据,那么整个游戏的逻辑都会对这个数据做出相应的回应,所以,我们需要对数据进行一个比较统一的管理,这里我们使用DataManager作为一个完整游戏数据的管理器。我们来看看这个DataManager是怎么样的。
在class目录下建立一个DataManager.js:
1 |
|
我们目前用到的东西还是不多的。后面我们会把需要的数据慢慢添加进来。
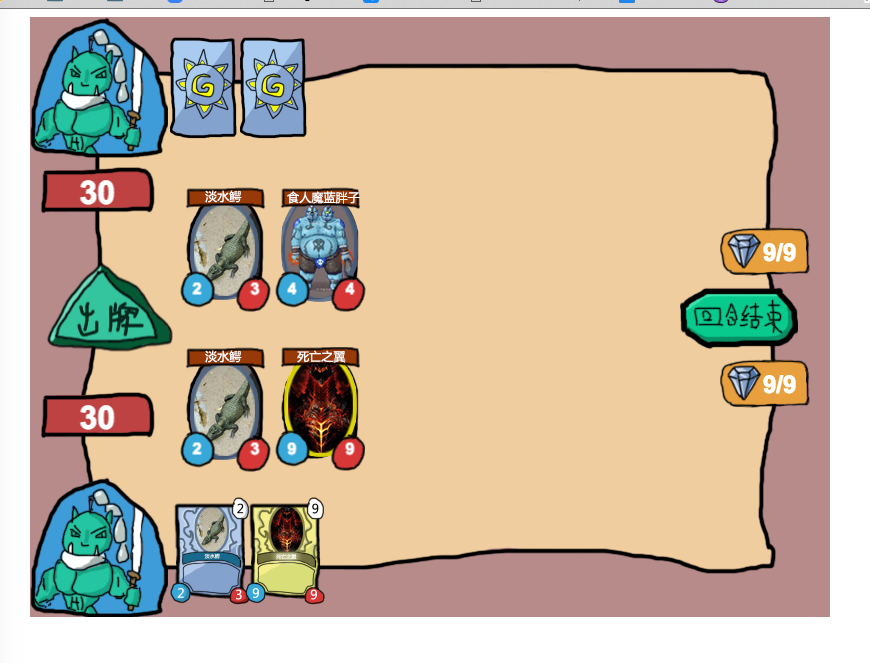
最后,看看我们浏览器中的样子,整个游戏大概是这个样子了:
我们现在选择卡牌,就会出现相应的动画反馈,并且我们的DataManager也能获取到我们选择的卡牌的信息,很不错,接下来要做的就是我们得把这张我们选择好的卡牌给打出去,而且要在战场上也生成相应的随从。
这时候我们发现,我们现在需要一个新的类来展示我们位于战场上的随从,我们新建一个Fighter.js类。
1 |
|
老套路,我们还得有个HeroFighter类来继承这个类,在class目录下新建一个HeroFighter.js:
1 |
|
有了基本的显示逻辑之后,我们要在UIManager中去触发这个出牌的事件,打开UIManager.js,找到出牌的按钮:
1 |
|
这样我们出牌之后,所有被放置在战场中的随从都可以正确的排开来显示,而不会重复挤在一个坐标。但是同时我们也发现了问题,就是我们的手牌也需要这样的功能,当我们出牌之后,手牌可能会出现一些空缺的位置,我们得把空缺的位置给补上,不然就太难看了。这时候我们得重构一下我的UIManager了,由于我们有了管理所有游戏数据的DataManager,那么我们就把在UIManager中实例化的一些本地数据要改为由DataManager所管理的游戏数据了。
1 |
|
我们得把上面所有涉及到数据结算的对象全部抽出,放在DataManager中进行统一的管理。
改完之后的DataManager:
1 |
|
然后把UIManager中的相关的数据也要做下更新:
1 |
|
好的,继续回到我们之前的问题,我们得开始给我们的手牌进行排序整理以填补打出去的牌所留下来的坑位,打开HandCard.js:
1 |
|
我们在这个类中加入这个方法,首先是判断手牌是否还存在,如果不存在了,排序肯定就是无法进行的,然后是更新排序的数组,由于我们的手牌对象在打出后就被销毁了,虽然我们看不见他,但是在我们的数组引用中他还是存在的,所以我们要便利我们的手牌数组引用,来确定属性alive为false的对象不在包含在数组之中。
这样,这个重排手牌的函数就算是完成了。最后别忘记了在UIManager中去适时的执行他。
1 |
|
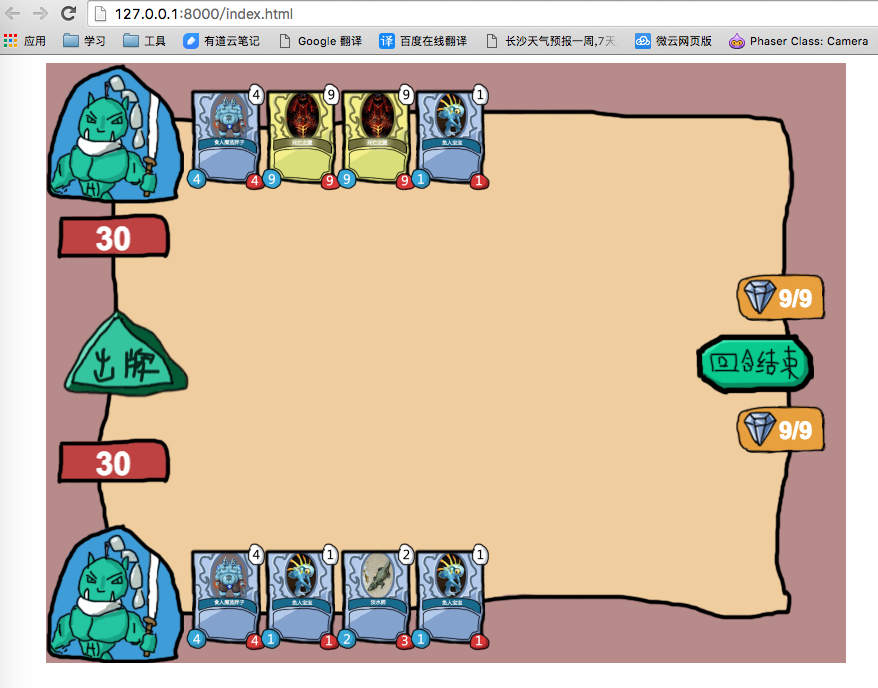
那么现在整个界面就想下图所示啦:
2.战斗随从的生成
回过头来看看,其实关于战斗随从的生成我们在上一个小节中已经实现了一部分了。但是现在我们通过手牌所生成的战斗随从是不正确的(我们把数据都是写死的)。我们接下来要做的事情是,得生成一个数据完全符合我们预期的战斗随从。这个战斗随从得有生命值,攻击力等属性。
战斗随从的生成思路也很简单,因为我们之前就把我们需要的数据都已经存到了手牌对象之中,那么只要我们拿到我们所出的那张牌,也就拿到了随从的所有信息,战场随从的生成也就是一件很简单的事情了。
如果还记得我们在之前实现手牌类的时候所做的数据处理,大家就回发现,其实这里我们可以直接拿这个数据来用,而不用再到配置表中去读那些数据了。
打开Fighter.js
1 |
|
我们这里主要是重写了buildFighter这个方法,我们在执行这个函数的时候传入了相应的参数来实现数据的正确绑定,最后在出牌的方法中加入相关的参数即可了:
1 |
|
至此,我们的手牌生成和随从生成的主要功能就做完了。接下来要做的事情是我比较喜欢的:电脑的AI。
3.AI
我其实本人一直都对AI挺感兴趣的。只可惜水平有限,在这里实现的这些所谓的AI都是采用的普通简单决策树算法,简单来说就是if else算法。根据一些我们能预料到的已知情况,再来做出相应的决策,其实我个人对机器学习的一些算法还是很感兴趣的,后面如果有机会会用有监督或者无监督的算法来改良这个AI(也可能就是说说而已)。
不废话了,我们现开始在class中建立一个AI.js类:
1 |
|
我现在也不清楚这个AI要做些啥,那么就先扔几个必须要做的函数进去。出牌你是肯定要做的吧,还有随从的攻击也肯定是要有的吧。其他的不知道的功能我们就后面慢慢来补充。
这个时候我们得开始整理下我们的代码了。我们把HandCard.js修改下:
1 |
|
我们把在init中的手牌生成函数全给注释掉,在我们的游戏中,敌人的牌是看不到的,所以在EnemyHandCard中腰调用的是设置卡背的方法,在HeroHandCard类中调用的是能看到卡牌所有信息的设置真实卡面的方法。
这里我们还的修改下我们的设置卡背方法,虽然我们看不到卡面的信息,但是这个信息应该是真实存在的,而且也应该是准确无误的:
1 |
|
ok,这里其实和设置真实卡面的函数是非常相似的。除了在设置显示图片的事件响应两者有些不同的逻辑,其他的都是一样的。
最后看下HeroHandCard:
1 |
|
EnemyHandCard.js:
1 |
|
走到这一步我们手牌设置还没完,我们看看我们的敌人手牌和英雄手牌。两个类使用的手牌对象管理数组是不同的(一个是cardObjList,另一个是cardViewList),所以在EnemyHandCard类中我们还需要重写reListHandCard这个方法,最后我们的EnemyHandCard应该是这样的:
1 |
|
这样就基本上能保证AI所出的牌都能正确的实例化为战场上的随从对象了。接下来我们就得继续写我们AI逻辑了。打开AI.js:
1 |
|
这里的AI的逻辑看起来应该是挺熟悉的,因为他是完全模拟了我们真人出牌的情景。首先是选择一张手上符合要求的卡牌(这里只要费用是允许的,既为符合要求的卡牌)。然后用我们的enemyChoise来储存这张卡的信息,最后将其实例为化为一个战场随从。
当然,别忘了新建一个EnemyFighter类来管理战场上的随从:
1 |
|
由于敌人出牌的逻辑运行是在玩家出完牌之后,而且是在玩家按下了会合结束按钮之后,所以这个出牌的整个逻辑,我们就写在这个按钮按下之后的事件响应中去,打开UIManager,找到setTurnOverButton方法:
1 |
|
直接加上DataManager.AI.shotCard方法就可以了。当然,我们按下按钮,然后敌人马上就把牌扔了出来,这个反应时间有点太快了,玩家可能难以反应过来,我们得加个定时器来做下延迟:
1 |
|
这样,敌人就像有所思考的出牌了。
最后看下我们的DataManager中的数据情况:
1 |
|
ok,到这里,AI简单的出牌逻辑就搞定了。现在你可以和AI一起来斗斗牌了,哈哈。接下来我们要做的事情就是战斗结算(包括AI的战斗逻辑)和一些费用的管理了。